How to make a flower in photoshop elements.
This is going to be a simple flower. Once you can make one flower it can be used to make lots of things. I am sure there are lots of ways to make flowers, but this one is fun ;)
Okay so open a window that is 1cm wide by 2 cm high with the usual parameters: resolution 300 per inch, rgb, transparent.
Now in the middle of this put a 1 cm circle using the shape tool. I have used white as it shows up well, also daisies are quite often white, but you can choose any color you like. The circle will be edge to edge but have room above and below. Click on the circle with the magic wand tool. Now say abracadabra! Just kidding, it's not quite that magic. A box will open saying do you want to simplify the shape. Click yes. Then click control D to get rid of the marching ants.
Go to the edit tab, go down to define pattern and click. Now name your pattern. I named mine white dot...because it was a white dot.
Open a new window, this time 10cm by 10 cm, usual parameters. Go to the layer tab and click on it. Down to new fill layer, then pattern and click. The last pattern you saved will be the default setting so click ok.
You will now have rows with 10 dots across. This is going to be very handy, however, it is not editable in the way we need it in this window. Open another window 10cm by 10 cm. Drag and drop the rows of dots into this window. They will now be editable.
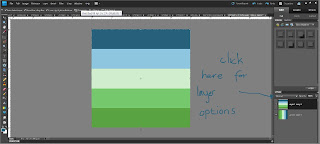
I hope you can see from the picture above that we have gone from one dot, to a layer fill of dots, to a drag and drop of the layer fill.
On the new window, using your rectangular marquee tool, go around one row of dots from end to end. Then click control J. You now have a layer with a row of dots. Hide the layer below, but keep it to use as an endless supply of petals. This way you can experiment without having to undo anything.
Using the move tool expand the petals from top to bottom filling the box. The petals can touch the top but not the bottom as it distorts the petal edge. If you would like to add some texture to the petals now is the time to do it. This is because if you wait until later the texture will be in one direction rather than around the flower.
Now the magic is coming. Go to the filter tab and click, go down to distort, polar coordinates (yes we have been here before...well done for remembering) and click on rectangle to polar and then click ok.
Do you have this? Phew!
Already you have a pretty good flower right. Your welcome ;)
What can you do with this really nice flower. Quite a lot. If you have a nice jewel you can put it into the centre.
Quite pretty? To get the jewel right in the middle of the flower click on the flower layer holding down the control button and then the jewel layer holding down the control button, both will go darker showing they are both selected. Go to the top tabs menu, there will be one saying align. If it isn't there click on the move icon. Choose firstly align vertical centres. Then click on it again and choose align horizontal layers. The jewel will now be in the middle.
This will now make a pretty flower. If you would like to add a drop shadow I would recomend opening a new layer and adding a background color, this gives you an idea of how the shadow will look against your chosen page. Remember to hide before you save your final flower. The shadow comes under the effects tab which is on the right hand edit menu.
Ok, I hear you wondering why I made you make rows of dots. Well it's because I like to think ahead :) to when you ask me what else you can do with the flower making. I am glad you asked.
Firstly I would like you to play around with this method. Open the layer with the dots in and create another row, but this time change how many dots you use. Maybe 5,7,or 8 dots, just remember that however many you use you must expand the width to fit from one side of the window to the other exactly. Or perhaps not :) ...see what happens if you don't.
Now play around with how much you stretch them, or how high or low you start on the page. Every time you can start with a new set of petals. I like to open a new box where I transfer flowers that I like. That way I will have layers of flowers.
This is a simple method, at least I hope you will think so once you have played with it, but the results can be really good. So would you like to see some flowers I have made using this method?
18 dots for 18 petals and with a nice centre made using a diamond and the star shape in the shape section.
Try other shapes, not just the circle, see what petal shapes you can make. This one was the flower shape from the shape section, looks a bit like an ice cream cornet lol. Remember, what you make can become anything you want. Using the select tool you could take out one of the petals, turn it upside down to make an ice cream cone, your photoshop your choice!
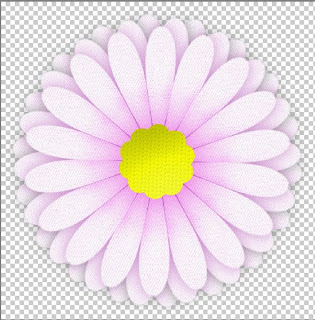
This one was created using 18 dots, the same dots we used earlier.
I added a weave texture, this is not a default texture on photoshop but canvas is very similar.
I extended the dots full width and length (not touching the bottom) and then used polar coordinates.
I then made three layers of the petals and changed the sizes to slightly increasing.
I rotated each layer until it was showing nicely.I did this by eye. Remember to align them all using the method above.
I then added a drop shadow to each layer making it pop. I adjusted the shadows by clicking on the tiny f which appears in the layers after you have added a drop shadow. This brings up a new menu with sliders that you can adjust. I changed the shadow colour by clicking on the tiny black square and then choosing the color pink.
Finally I added a centre. Again I added a drop shadow and changed the color of it to pink. Ta da! if this sounds complicated it will get easier each time you practise, so get used to the method above and try again :) Or come back to it and try, the more you get used to using photoshop the easier it will become.
So this one is super cool right? And complicated I hear you saying. Yes and no. It follows the same method as above. Once you have made one layer just stack them up. This one was made using the petal arrangement above but without the centre. I think there are 8 layers. All with shadows. once I had all the layers it wasn't filled into the centre. There was still a big gap. So don't get worried lol.
I took the flower I made with the layers and put it into a new layer. I clicked on filter tab, down to distort, but this time I clicked on liquefy. A new window will pop up with your flower in the middle. On the left hand side menu, 5th one down is what looks like a squished x. Click on this, now go to the size of brush and click in the middle. A big enough circle to cover most of the flower. This option shrinks everything within the circle. Place the circle over the flower exactly. Click a little at a time. The flower will start to shrink into itself. play around with this. It's fun! if you don't like the results click revert. If you liked them, then went a bit too far undo last move with control z (only works one undo). That is how I made the flower above, using everything thing I have explained in this tutorial. Nothing more :) well except imagination...and a fearless exploration of photoshop...join me!


