How to make scalloped edging.
This is going to use one of my favourite techniques which is offset. Offset is your friend in so many ways and such a time saver.
So I am going to assume you have already read how to make a perfect circle and so don't need to know how to open a page again. If you didn't and you really are a newbie then read that first.
Now I know there are lots of ways of doing the same thing but this is how I make my scalloped edging.
Firstly I open a window which is 1cm by 1 cm. Use magnify...the second button on the left to click in til the picture becomes big enough.
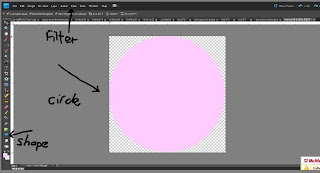
Then I click on the shapes button on the left hand side column. It has a heart picture on it.
A new tool bar will appear at the top which gives you all the shapes and what size you want them. The first one is proportion click 1 cm by 1 cm. The second is shape, pick the solid circle.
Now click inside the window to make your circle, any color I don't mind :)
I went with girly pink. So it's pretty easy so far right?
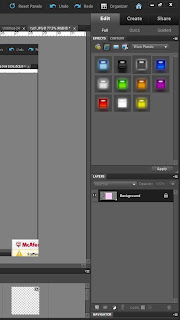
Now using the marquis tool on a new layer ...I know you know where new layer is but just in case it is the box on the bottom right hand side at the bottom...ok make a rectangle that is the same width as the circle from halfway down and going to the bottom of the box. Also fill this in with your chosen colour (the same color obviosly lol) Control d to get rid of the marquis lines.
Now merge visible layers.
To do this go to the layer button at the top, 5th button in, drop down menu and look at the bottom and pick merge visible.
If it isn't working it is because you are not clicked on either of your layers.
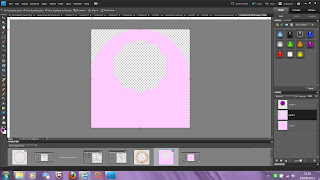
Now if you want to get fancy at this point you can make a hole in the scallop. To do this use your eraser on brush and choose a size that gives you the hole you want. Or go crazy and put lots of holes in, what ever makes you smile.
Ignore this next bit unless you are super duper and move on to
are we all together...
If you really want to be clever then pick another shape from the shape menu. Open a new layer by clicking on the new layer box at the bottom left of the layer pallette and choose another color. This is so the shapes show up against each other. You now have 2 layers, one with the scallop element and one with a shape you would like to cut out of it.
Select the layer with the shape to be cut out. Hold down the control key and click on the little picture of the element in the layers pallette (layer pallette is bottom right of the screen.)
Or using the marquee tool put a marquis box around it and click on the move tool (first box on the left hand side menu) then press the right arrow.
Either way will put marching ants all around the shape.
It will say the shape needs simplifying (This is because shapes are vectors not raster images and need to be converted). Click yes.
This will put the marquis around the shape.
If you used the marquee and move method click the left arrow to make sure your shape is still in the middle.
Now click on the layer of your scallop.
You want to make a layer that has your scallop shape but with the hole shape cut out of it. To do this click and hold the control key,the up arrow which is right above the control key and the i button. This will select the inverse area around the cut out shape and select it from the scallop shape giving you everything but the hole you want.
Then click control j. This puts your new selection in its own layer.
So now you are thinking is this an episode from star trek...I know ...it's confusing but if you follow it slowly and exactly you get this
 There will now be three layers in your layer box. One will be you scallop element. One will be the shape you chose to cut out of it and one has your scallop element which has the perfect hole in the shape you chose. Ta da!
I made the hole big so you can see the shape, but really that is too big...play around with it and have fun
Are we all together?
Hello again :)
Now for the fun bit.
Select the whole shape again using either method above
The marquis will now be around the exact shape.
Click on image and then crop using the image tab then down to crop.
Control d to get rid of marquis.
This is to make sure there are no gaps around your shape which sometimes happens.
Click on filter and go right down to the bottom of the menu to other, a new menu will pop out, then click offset.
I know you are probably thinking this is a lot of work but it is worth it I promise you. Because if you get familliar with this so many things open up to you.
So you are now in offset, slide the across slider until your shape is moved halfway. Check there is no gap between. If there is use your dropper to pick the exact color again and then paint a line down between.
Now click on image: resize: canvas and make the height 2 cm. This is not essential but makes things easier.
Click on edit and define pattern, name it scallop and save...you are nearly there :)
Open a new window 20 cm by 20 cm and click on layer tab, then new fill layer, then pattern and then click ok.
You will now have rows and rows of scallops that can be adjusted for size by clicking on the layer thumbnail.
Once you have the size you want open a new window and click on the window in the project bin at the very bottom of the page which has your layer with the rows in and drag it into the new window, this will transfer the lines across.
(Why did i do this? Some things that you do in photoshop have background programming that limits their editable nature. Dragging and dropping gets rid of the background programming allowing you to edit them in ways that were not possible in the old window.Now you will be able to edit them further.)
Put a box of marquis around a row and press control j to get just one line of scallops in a new layer.
Hide the other layer and you now have a row of scallops that can be used for edging or to make a frame.
Once you have the basic row find a nice pattern paper that you like. Put it in a layer above the row and then click control g. This will cut the pattern paper to the exact shape. Use move tool to move the paper up and down till the pattern looks good on your scallops.
Try adding a texture to the paper, such as canvas which can be found in filter then texture and then texturiser
Even better as they are made from a tile if you want to make a scallop frame using the simple circle technique the ends should match perfectly if you make sure each end of the ribbon is cut off at the same point.
Try it, turn your new scallop upside down, take it to 2/3s of the way down the page, make it wider and then filter, distort and polar coordinates, rectangle,ok
Again you can place a patterned paper in a layer above and click control g to make a lovely picture frame. This is one I made earlier.
I know this has been a lot to take in. It has been a whirlwind of tabs and control buttons. Well done to you and pat yourself on the back. Take your time and go back over this until the buttons become so familiar you don't have to think before using a short cut control button to do something else that you want to do.
Nest time I will show you how learning to use offset will open up a whole new world in pattern making for papers. No longer will you have to spend money getting the exact thing you need.
Bye for now
Claire


No comments:
Post a Comment